Can you put an Android SIM card in an iPhone? If you have ever pondered this question, you are not alone.
The intersection of two dominant mobile platforms, Android and iOS, has sparked curiosity among tech enthusiasts and smartphone users.
Well, the good news is that, yes, it is possible. An Android SIM card can be used in an iPhone, provided you follow a few steps.
In this article, we will delve into the compatibility, carrier support, and necessary precautions to integrate an Android SIM card into your iPhone seamlessly.
So, let’s explore this intriguing crossover and unlock new possibilities for your smartphone experience.
Why Should You Use an Android SIM Card With an iPhone?

1. Compatible With the Same Carrier
When using an Android SIM card with an iPhone, one of the significant advantages is the compatibility factor. Surprisingly, both Android and iPhone SIM cards are interchangeable on the same carrier network.
If you switch from an Android device to an iPhone, you can transfer your existing SIM card and continue using the same network without hassle.
The SIM card is the gateway to your cellular network connection, enabling you to make calls, send messages, and access mobile data.
2. Available On Both Systems
It’s worth noting that the concept of SIM cards is not exclusive to Android or iPhone alone.
SIM cards are standardized across the mobile industry, making them universally compatible.
This means that whether you are using an Android device or an iPhone, you’ll have access to SIM card functionality.
This flexibility allows users to switch between devices more efficiently without the need to change or acquire a new SIM card.
3. Works Smoothly On Older iOS
If you are using an older iOS version on your iPhone, you’ll be glad an Android SIM card can work seamlessly.
The SIM card is primarily responsible for connecting your device to the network, allowing you to make calls, send texts, and browse the internet.
Since the SIM card functionality is not dependent on the operating system, using an Android SIM card with an older iOS version poses no significant issues.
This compatibility ensures you can continue enjoying your network services without worrying about compatibility constraints.
Also check out: What is Samsung Android Dialer
How To Remove a SIM Card From Android And iPhone?

Step 01: Finding the Pinhole
Removing a SIM card from your Android or iPhone requires simple steps. Let’s start with the first one.
On most Android and iPhone devices, you will notice a small pinhole on the side or top edge of the phone. This pinhole is where the SIM card tray is located.
Take a closer look at your device and locate this pinhole. It may be labeled with a SIM card icon or “SIM.” Once you have found it, you are ready to move on to the next step.
Step 02: Using the SIM Ejector Tool
Now that you have identified the pinhole, it’s time to grab the SIM ejector tool. This tool usually comes with your smartphone or can be purchased separately.
It is a small, thin metal pin that fits perfectly into the pinhole. Insert the SIM ejector tool firmly into the pinhole, applying gentle pressure.
You will feel a slight resistance, but keep pushing until the SIM tray pops out.
Step 03: Pulling out the Tray
With the SIM tray now ejected, you can remove the SIM card from your Android or iPhone. Carefully pull the tray out using your fingers or a pair of tweezers if needed.
The SIM card is located on the tray. Gently lift it out and set it aside. Take a moment to inspect the SIM card for any damage or dirt.
Clean it with a soft, lint-free cloth before reinserting it or replacing it with a new one.
How To Insert A SIM Card Into An iPhone?

Step 01: Turn Off Your iPhone
Before you begin inserting a SIM card into your iPhone, it’s essential to turn it off. This ensures that you will not accidentally damage the device or interfere with its functioning during the installation.
Press and hold the power button until the “Slide to Power Off” option appears on the screen. Swipe the slider to the right, and your iPhone will shut down gracefully.
Step 02: Choose The Right SIM Card Size
iPhones support different SIM card sizes, depending on the model.
The most common SIM card sizes are standard SIM, micro SIM, and nano SIM. To determine which size you need, consult your iPhone’s user manual or visit the official Apple website.
Once you have identified the correct SIM card size, ensure you have an appropriate SIM card handy for installation.
Step 03: Finding The SIM Card Slot
The SIM card slot on an iPhone is typically located on the side of the device. The exact placement may vary depending on the iPhone model.
In most cases, you will find the SIM card slot on the right-hand side of the iPhone. It may be accompanied by a small pinhole or a SIM card ejector tool provided by Apple.
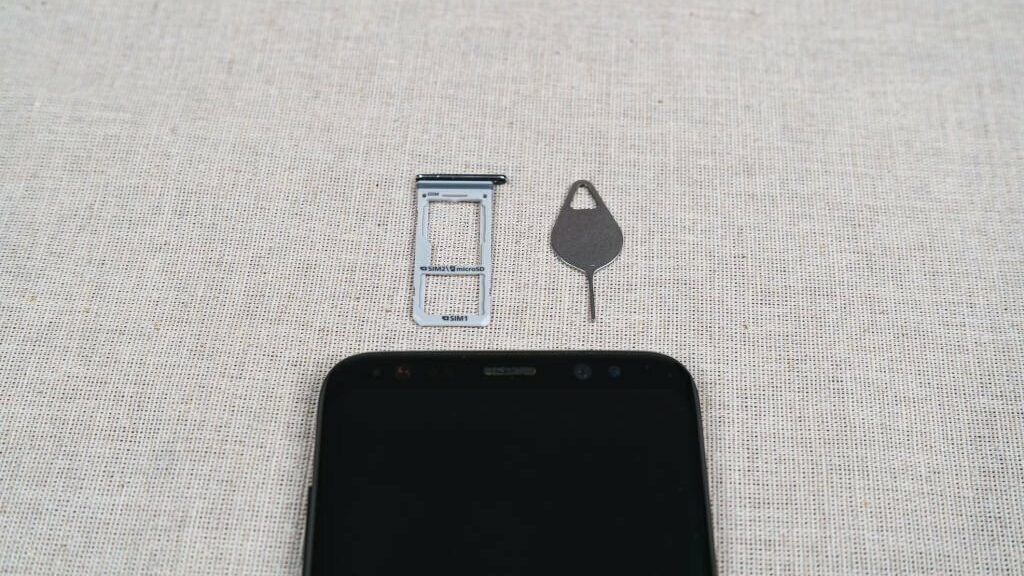
Step 04: Pull Out The Tray
To access the SIM card slot:
- Insert the SIM card ejector tool or a paperclip into the pinhole next to the SIM card slot.
- Apply gentle pressure until the tray pops out slightly. You can then pull the tray out completely using your fingers.
- Be cautious while handling the tray, and avoid using excessive force to prevent damage.
Step 05: Put Android’s SIM Card
Take your Android SIM card and carefully place it into the SIM card tray. Ensure that the SIM card’s gold contacts align with the tray’s contacts.
The orientation may vary depending on your iPhone model, so refer to the user manual or Apple’s official guidelines for specific instructions. Push the tray back into the iPhone until it sits snugly in place.
Step 06: Set Tray To Default Position
After inserting the SIM card, ensure the tray is securely in place. Push it back into the iPhone until it is fully inserted.
Ensure the tray is flush with the device’s side, with no visible gaps. This ensures proper alignment and prevents any potential issues or damage.
Step 07: Power On Your iPhone
Now that the SIM card is installed correctly, it’s time to power on your iPhone. Press and hold the power button until the Apple logo appears on the screen.
Your iPhone will start up, and if the SIM card is recognized, you should be able to access cellular services and make phone calls.
Can You Put a Samsung Sim Card in An Iphone 14
The answer is a resounding no.
Why, you ask? Well, it all comes down to compatibility. You see, each device has its unique SIM card type, and unfortunately, they are not interchangeable.
The iPhone 14 requires a Nano-SIM, whereas Samsung devices typically utilize a Standard, Micro, or Nano-SIM.
These differing SIM card sizes and configurations mean that you will not be able to simply pop your Samsung SIM card into the iPhone 14 and expect it to work.
Conclusion
While iPhones traditionally use a different SIM card format (Nano-SIM) compared to many Android devices (Micro-SIM or Nano-SIM), it is possible to use an Android SIM card in an iPhone with the help of an adapter.
By using an adapter, you can modify the SIM card’s physical dimensions to fit the iPhone’s SIM card tray.
However, it is essential to note that this action may have limitations and potential compatibility issues, such as the inability to access certain network features or services specific to the iPhone.